Production tips
Prompt Tips for Tooners #2 - Combat Scene
 Team ToonkitViews —


What happens if you simply ask AI to "Create a video of two characters fighting." ?
Of course, the AI will generate a video of two characters fighting.
However, the result may be quite different from the action scene you had in mind—one filled with fast exchanges, flashy techniques, and powerful impacts.
In this installment, we'll create the same one-on-one fight scene using three different prompts and explore how to write better prompts for higher-quality combat scenes.
Prompt #1 — Describe Only the Action
Create a video of James and Alex fighting each other.
Prompt #2 — Add the Flow of Combat
James and Alex engage in a fast-paced one-on-one fight.

James quickly attacks, and Alex twists his body to dodge the attack before immediately counterattacking.

The two characters rapidly exchange attacks and dodges, creating a dynamic and flashy action sequence.
Prompt #3 — Direct the Attacks, Dodges, Counters, and Camera
James and Alex engage in an intense, fast-paced one-on-one fight.

James suddenly closes the distance and launches a powerful attack. Alex narrowly twists his body to dodge it, then immediately counters with a flashy series of attacks.

The two characters continuously exchange attacks, dodges, and counterattacks without breaking the flow of combat.

The camera rapidly tracks both characters, moving dynamically to follow the flow of the fight.

When a powerful attack lands, add a brief camera shake and motion blur, and show the opponent's body naturally being pushed backward by the impact.

Create a cinematic action sequence filled with fast exchanges and flashy techniques.
Can You Feel the Difference?
All three prompts ask for the same thing: "James and Alex fighting."
However, the flow of combat communicated to the AI is completely different.
The first prompt simply tells the AI what is happening (Action).
The second adds a sequence: Attack → Dodge → Counter.
The third goes even further by adding:
- Action Sequence
- Camera Movement
- Impact Effects
- Reaction
In other words, instead of stopping at:
Fight
describe the battle as a continuous sequence of actions, such as:
Attack → Dodge → Counter → Impact → Reaction
Tip #1: Describe the Sequence of Actions Instead of Just Saying "Fight."
The first thing to change in a combat prompt is the single word Fight.
❌
James and Alex fight.
When you write it this way, the AI has to decide for itself what kind of actions should happen between the two characters.
Instead:
✅
James attacks.
Alex dodges the attack.
Alex immediately counterattacks.
James steps backward and prepares to attack again.
Writing it this way makes the relationship between each character's actions and reactions much clearer.
For one-on-one combat in particular, the following structure works well:
Attack → Dodge → Counter → Impact → Reaction
One character attacks, the other dodges, counters, an attack lands, and the opponent reacts to the impact.
Tip #2: Describe Flashy Techniques as a "Sequence of Actions."
"Fight in a flashy way."
"Use a cool special move."
Even simple descriptions like these can give the AI some direction.
But if you want a specific type of action, it's better to describe the flow of movement rather than the technique itself.
For example:
❌
Perform a flashy attack.
Instead:
✅
Quickly close the distance, launch an attack, then spin into a rapid combo.
There are many useful expressions you can try:
- Rapid combo attacks
- Spinning attack
- Aerial attack
- Dash attack
- Powerful counterattack
- Rapid dodge
- Close-range combat
- Continuous attack sequence
The important thing isn't to use lots of flashy words.
Instead, help the AI understand:
"What action happens next?"
Tip #3: Always Give an Attack a "Reaction."
One surprisingly important part of a combat scene is how the character reacts after being hit.
If you only describe the movements of the attacking character, the attack itself may look flashy, but the scene can still lack a sense of impact.
So try describing the reaction to the hit as well.
For example:
When the powerful attack lands, the opponent's body is pushed backward by the impact.
Or:
The impact sends the opponent sliding backward.
You can also combine this with several visual effects:
- Camera Shake
- Motion Blur
- Impact Flash
- Shockwave
- Sparks
- Debris
- Speed Lines
- Brief Slow Motion
For example, combining:
Impact + Camera Shake + Reaction
can make an attack feel much more powerful than simply describing the hit itself.
Tip #4: Change the Speed at Key Moments.
A flashy action scene doesn't need to stay fast from beginning to end.
Changing the speed at important moments can actually make the action feel even more dramatic.
For example:
The two characters rapidly exchange attacks, then the scene briefly transitions into slow motion just before a decisive attack lands.

At the moment of impact, the scene returns to normal speed to emphasize the force of the hit.
In other words, you can create a rhythm like:
Fast → Slow Motion → Impact → Fast
This works especially well for moments such as:
- A decisive attack
- A narrow dodge
- A powerful counterattack
- A character's finishing move
💡 Think About Combat Prompts Like This
In Part 1, we talked about adding camera direction when writing video prompts.
For combat scenes, you can add one more thing:
Don't just think about what Character A is doing. Think about how Character B reacts as well.
The next time you create a combat video, try describing these five things:
- Who attacks first? (Attack)
- How does the opponent respond? (Dodge / Block)
- What happens next? (Counter / Combo)
- How does the attack feel? (Impact)
- How does the opponent react to the attack? (Reaction)
Add the Camera Movement introduced in Part 1, and you can create an even more dynamic combat scene.
✨ Bonus Tip! Try Magic Wand.
If writing detailed prompts feels difficult, or you simply want better results with less effort, give Magic Wand a try.
Magic Wand is a free AI-powered prompt enhancement feature available in Toonkit.
It analyzes your prompt and automatically enriches elements such as camera work, character movement, scene direction, and visual descriptions—transforming your idea into a more polished and detailed prompt.
(Magic Wand before/after comparison image)
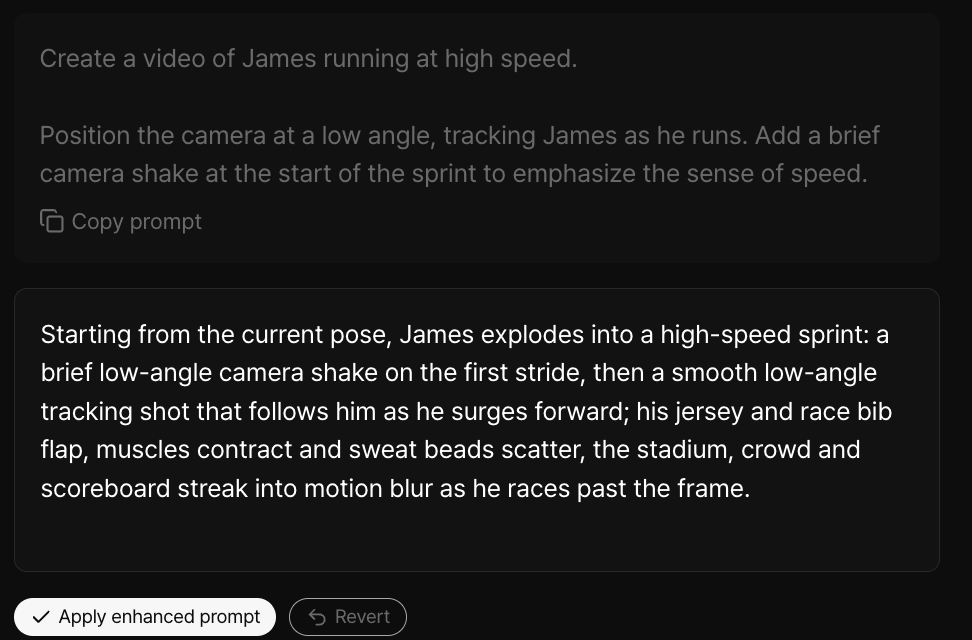
Magic Wand automatically transforms your prompt into a richer, more detailed version while preserving your original intent.
For example,
Create a video of James running at high speed.

Position the camera at a low angle, tracking James as he runs. Add a brief camera shake at the start of the sprint to emphasize the sense of speed.
With just one click on ✨ Magic Wand, Toonkit automatically enhances your prompt by expanding details such as:
- Character movement
- Camera work
- Motion and speed
- Environmental details
- Natural scene flow
This feature is especially helpful when you know what you want to create, but aren't sure how to describe it.
💡 Tooners Tip
You don't need to write the perfect prompt from scratch.
Start with your core idea, then refine it using the free Magic Wand feature.
With just one click, anyone can create richer, more polished prompts.
Coming Up Next
Prompt Tips for Tooners #3
In the next installment, we'll be back with more prompt-writing tips to help you create another type of scene with even better results.
Was this article helpful?
Your feedback helps us create our next article.
More to read
View all ›
Prompt Tips for Tooners #3 - 10 Camera Shots and Angles
The same scene can look completely different depending on camera composition. From Extreme Wide Shot to POV Shot, this post introduces 10 camera shots and angles you can use directly in AI image and video prompts.
Team Toonkit44 views
Prompt Tips for Tooners #1 - Running Scene
The same scene can produce dramatically different results depending on how you write your prompt. Learn practical prompt tips you can use in Toonkit.
Team Toonkit75 views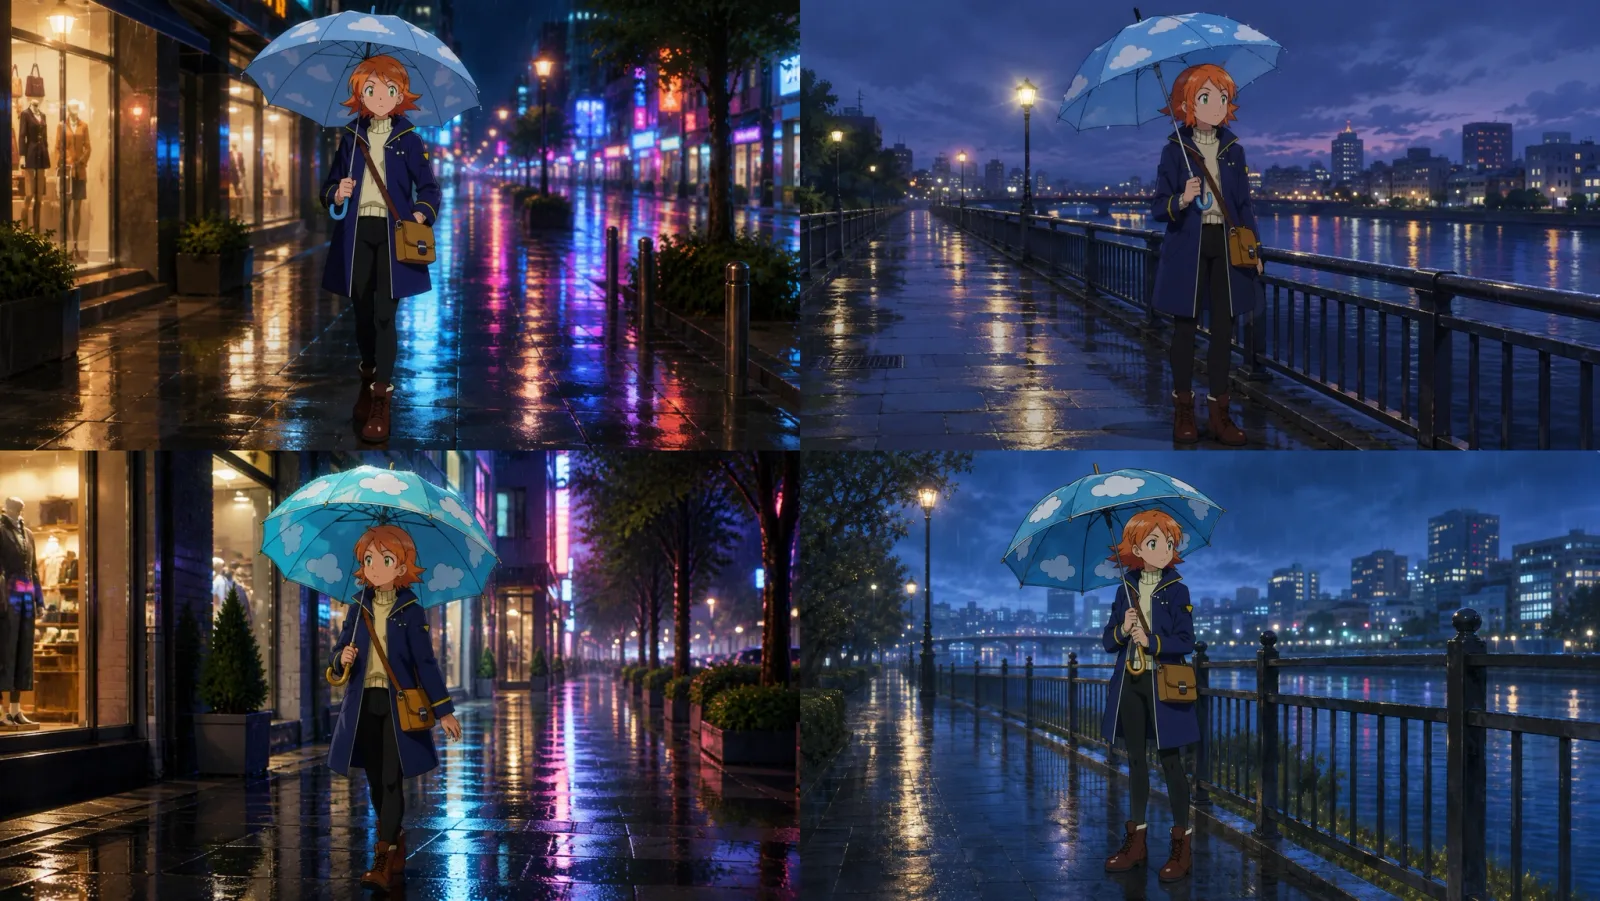
Why does the same umbrella look different every time? Before vs. after specifying prop references
How big is the difference between describing a prop in a prompt versus referencing an actual prop image? Here is a direct comparison featuring the same umbrella across two different scenes.
Team Toonkit65 views