
Storyboard - Cut Creation
It's the workbench where you finish a single cut. If Storyboard is where you see the whole story, Cut Creation is where you focus on one cut.
Create the cut image, touch it up with AI, change its style, and turn that image into a cut video — handle a cut from start to finish, right here.
Get to know the screen
Explore the five areas of the Cut Creation screen and what each one does.


Last Glance
Assets
Storyboard
Cut Creation
Video Edit
93

Image
Video
All Cuts
1/6
Scene 1 / Cut 1
Scene 1 / Cut 2
Scene 2 / Cut 1
Scene 2 / Cut 2
Scene 3 / Cut 1
Scene 3 / Cut 2
Add Cut
Generated History
Total 1 generated
Final cut
4s
Video Generation
Select Model

Seedance 2.5
New
Popular
Generates coherent videos up to 30 seconds in one request and accepts up to 50 reference assets.
720p
4s
ON
From references
From Frames
First frame
End frame
Click to add a generated image
Video Prompt
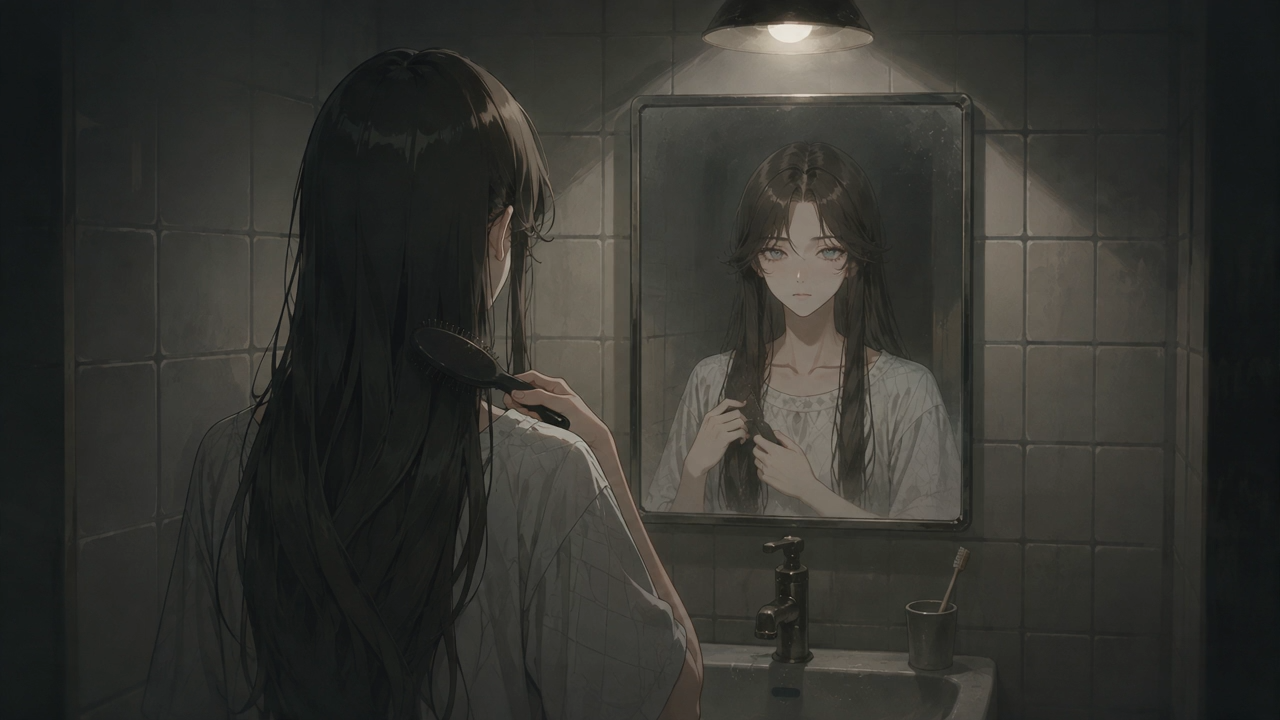
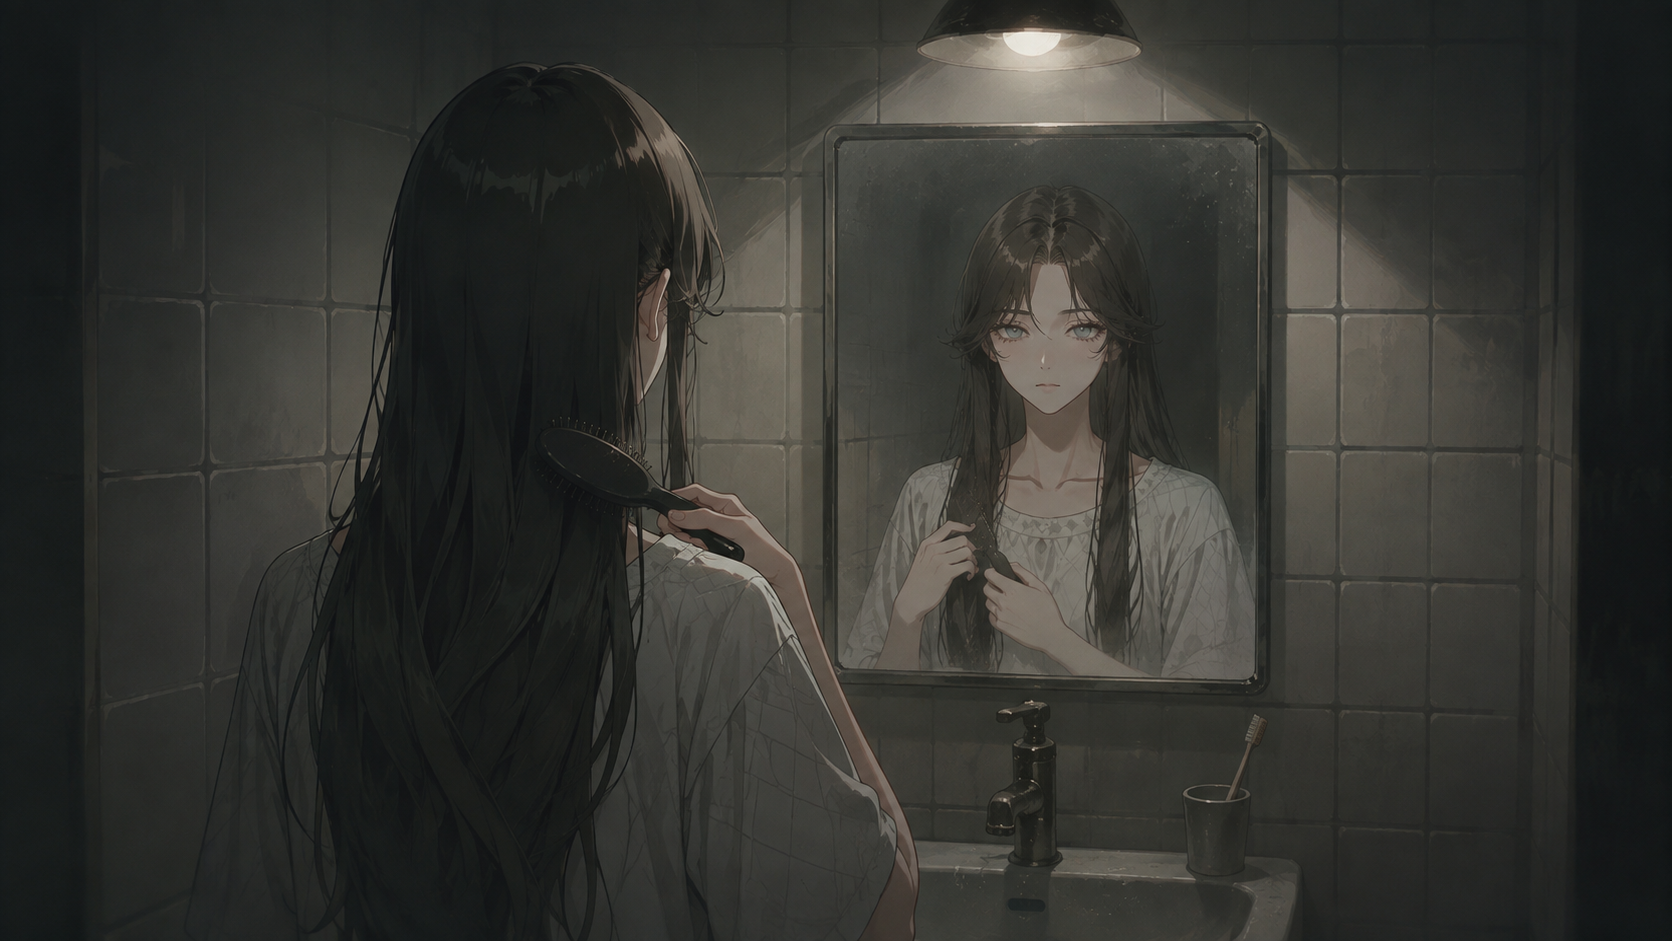
@Woman in the Mirror stands motionless at the small bathroom sink as the night silence presses in. Her hand moves slowly through her long black hair with each drag of the brush, strands separating and falling back into place. The loose white nightgown shifts slightly with her breathing. Her pale reflection in the mirror blinks once, eyes heavy with dark circles, then resumes its fixed stare. A faint hum from the bathroom light vibrates in the background, giving the scene a tense, eerie stillness.
Please enter a prompt
84 / 1,000 words
Auto generate
Generate Video

120
All Cuts
1/6
Scene 1 / Cut 1
Scene 1 / Cut 2
Scene 2 / Cut 1
Scene 2 / Cut 2
Scene 3 / Cut 1
Scene 3 / Cut 2
Add Cut
All cuts
Cuts · Your scene list. Switch between cuts or Generate images for multiple cuts generate several at once.
Canvas
View your selected image and videos in the main preview. Zoom from 25% to 400%.
Generation history
Everything generated for this cut Images and videos are saved here. Click a result to view it.

Video Generation
Select Model
Seedance 2.5
New
Popular
Generates coherent videos up to 30 seconds in one request and accepts up to 50 reference assets.
720p
4s
ON
From references
From Frames
First frame
End frame
Click to add a generated image
Video Prompt
@Woman in the Mirror stands motionless at the small bathroom sink as the night silence presses in. Her hand moves slowly through her long black hair with each drag of the brush, strands separating and falling back into place. The loose white nightgown shifts slightly with her breathing. Her pale reflection in the mirror blinks once, eyes heavy with dark circles, then resumes its fixed stare. A faint hum from the bathroom light vibrates in the background, giving the scene a tense, eerie stillness.
84 / 1,000 words
Auto generate
Generate Video

120
Right panel
Image and video options and cut information. Model, prompt, and background
Set your options, then generate.
Image & Video
Switch between image and video Switch generation modes.
* Generate an image first to unlock the Video tab.

Learn the screen layout
Get a quick feel for the main areas of the Cut Creation screen.
| Zone | Description | |
|---|---|---|
| Top tabs | Image / Video | Choose which media mode to work in. The Video tab unlocks only once at least one representative image is registered. |
| Left panel | All Cuts panel | See every scene and cut in the current project at a glance. Click a cut to view its details and generate that cut's image or video individually, or use Auto-generate images at the top to select multiple cuts at once or batch-generate just the empty ones. |
| Center | Workbench (canvas) | This is where you view the selected image or video result at its largest. For image cuts, zoom finely from 25% to 400% and pan freely with the mouse wheel. |
| Bottom | Generation history | This is an archive of every rendering result generated so far for this cut. Click a tile to load it into the canvas instantly. |
| Right | Options panel | AI model selection, aspect ratio, advanced prompt mapping, per-cut voice volume assignment, and every other detailed control live here. |
Step-by-step guide
Follow these steps for the creation goal you have in mind.
Make a cut image — three ways
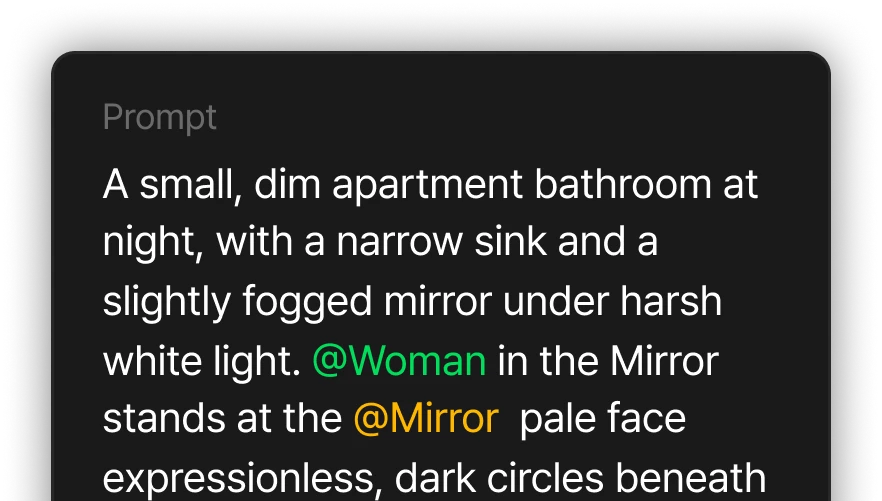
Pick a model in the image generation panel on the right and write your prompt. Type @ in the prompt to mention this project's characters and props.
1. Generate with a prompt
Pick a model in the image generation panel on the right and write a prompt.
Type @ in the prompt to mention this project's characters and props.
*The mentioned character's appearance carries over as-is. Characters are shown in green, props in yellow.
You can also pick a background asset — leave it as "None" and a background that fits the scene is generated automatically.
2. Direct upload & Global Asset
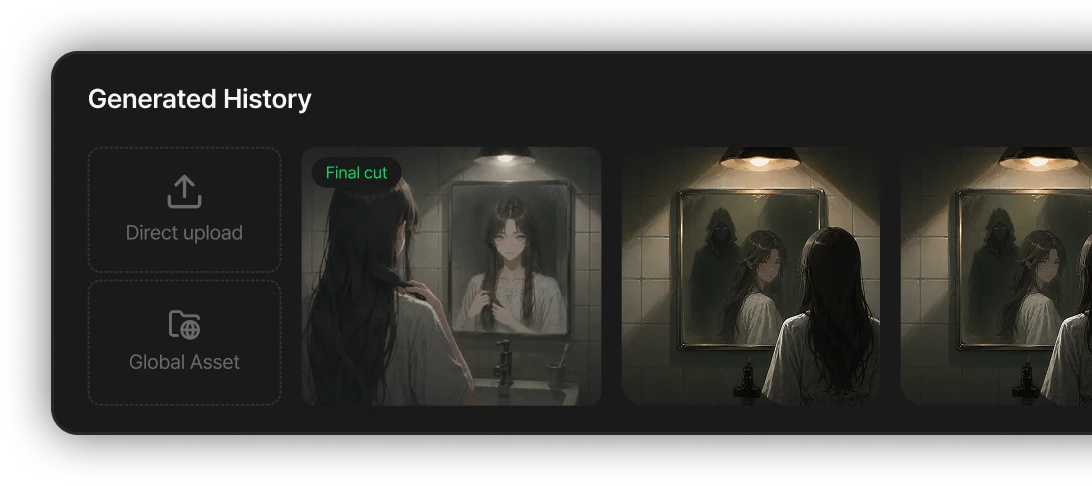
Upload your own image via the Direct upload tile at the front of the generation history,
or pull in an image you've saved to Global Asset right away.
Handy for reusing results you made and saved in the Playground or Canvas as a cut.
3. Generate multiple cuts at once
Click the [Auto-generate images] button in the all-cuts panel on the left
to batch-generate either "empty cuts only" or "all cuts."
The button shows the total credit cost, so be sure to check it before proceeding.
Refine with AI Edit
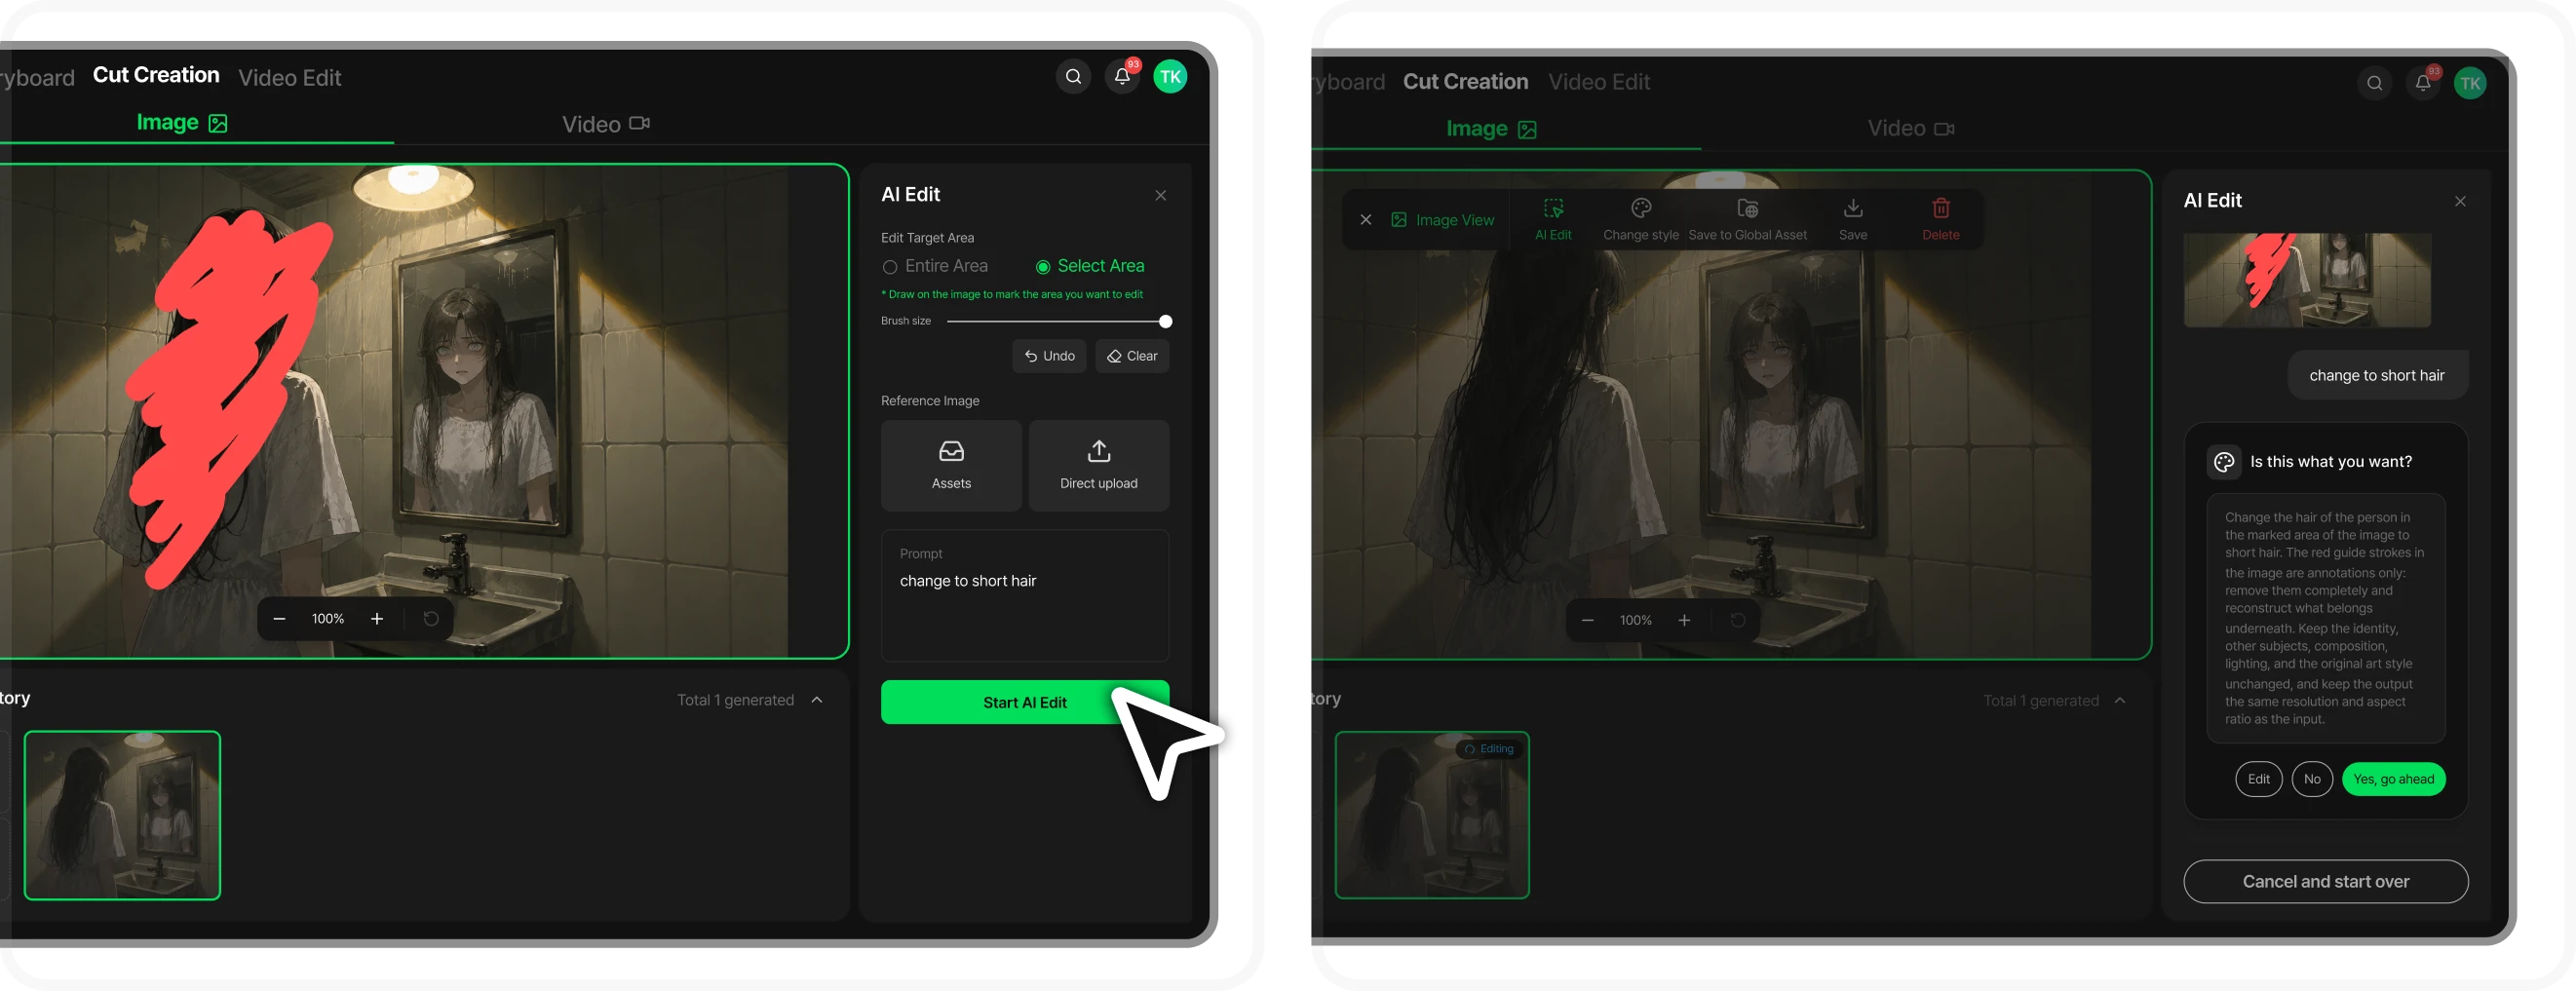
- Select an image from the history and tap AI Edit in the toolbar.
- Choose what to edit.
Pick Entire Area to change the whole image, or Select Area to change just part of it — brush directly on the image to mark the area.
(Undo / Clear lets you redo the brushing)
- Write a prompt describing the change.
e.g. "Generate a mug in this spot"
- Tap Start AI Edit and the AI gets to work.
If the AI asks for direction partway through, answer by typing it in yourself or let it decide for you; once it shows you the plan, approve with Yes, go ahead.
Once editing starts, it runs in the background. It keeps going even if you leave the page or close the window, and the original card gets an 'Editing' badge.
Come back and progress picks up right where it left off — when it's done, the new image is added to the history automatically.
Change the art style
Want to change just this cut to a different art style? Tap Change Style in the toolbar.
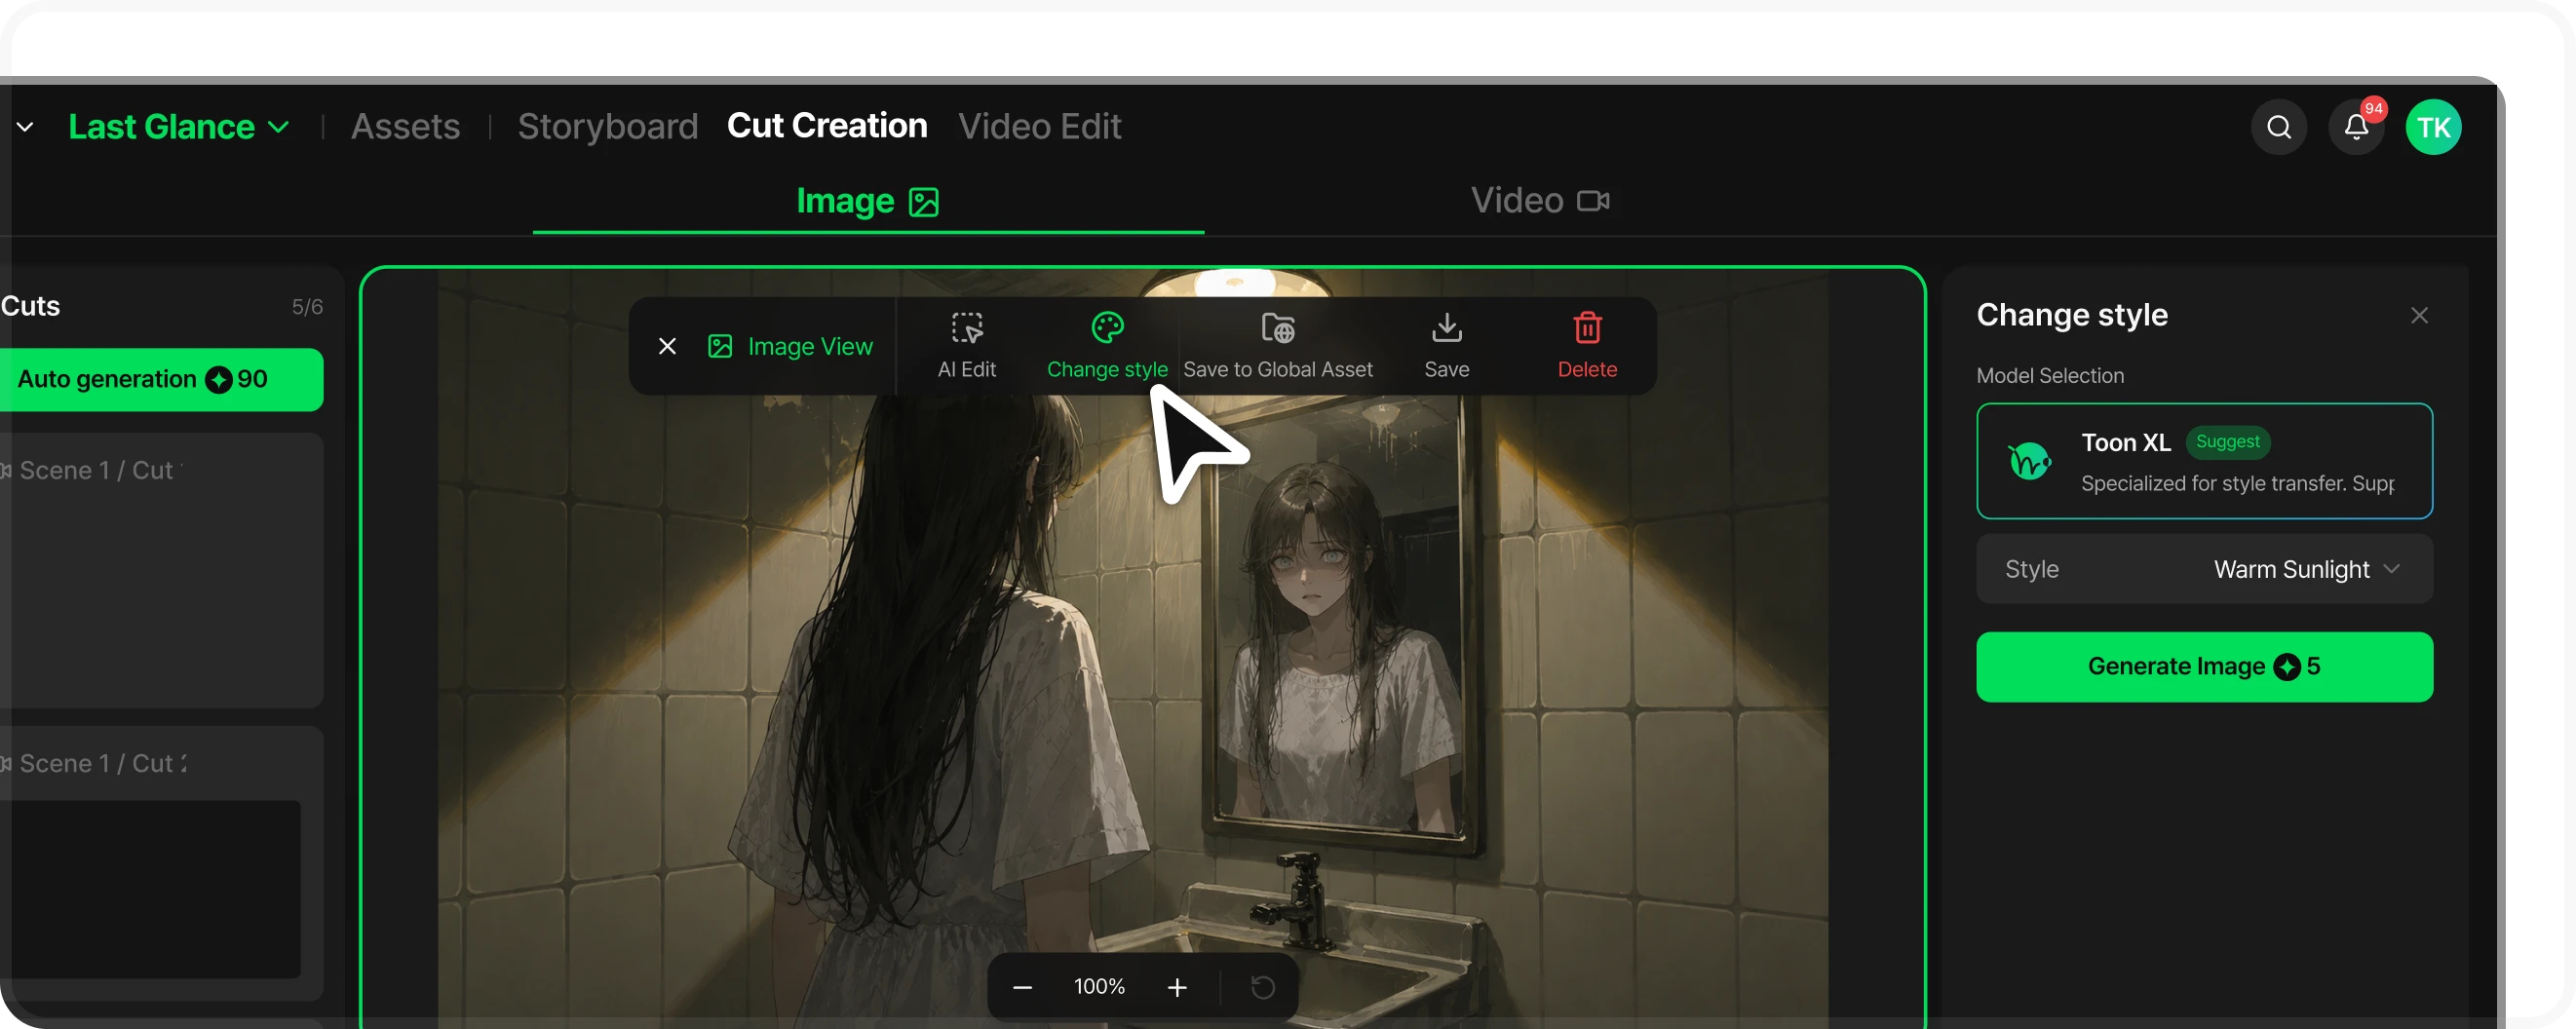
Toonkit Style (LoRA)
Pick the style you want to apply and click Generate Image.
The result is added to the history as a new image, and the original stays untouched. Try a few styles and pick the one you like.
Choose the representative image (thumbnail)
Once several images or videos have piled up in the history, decide which one should represent this cut.
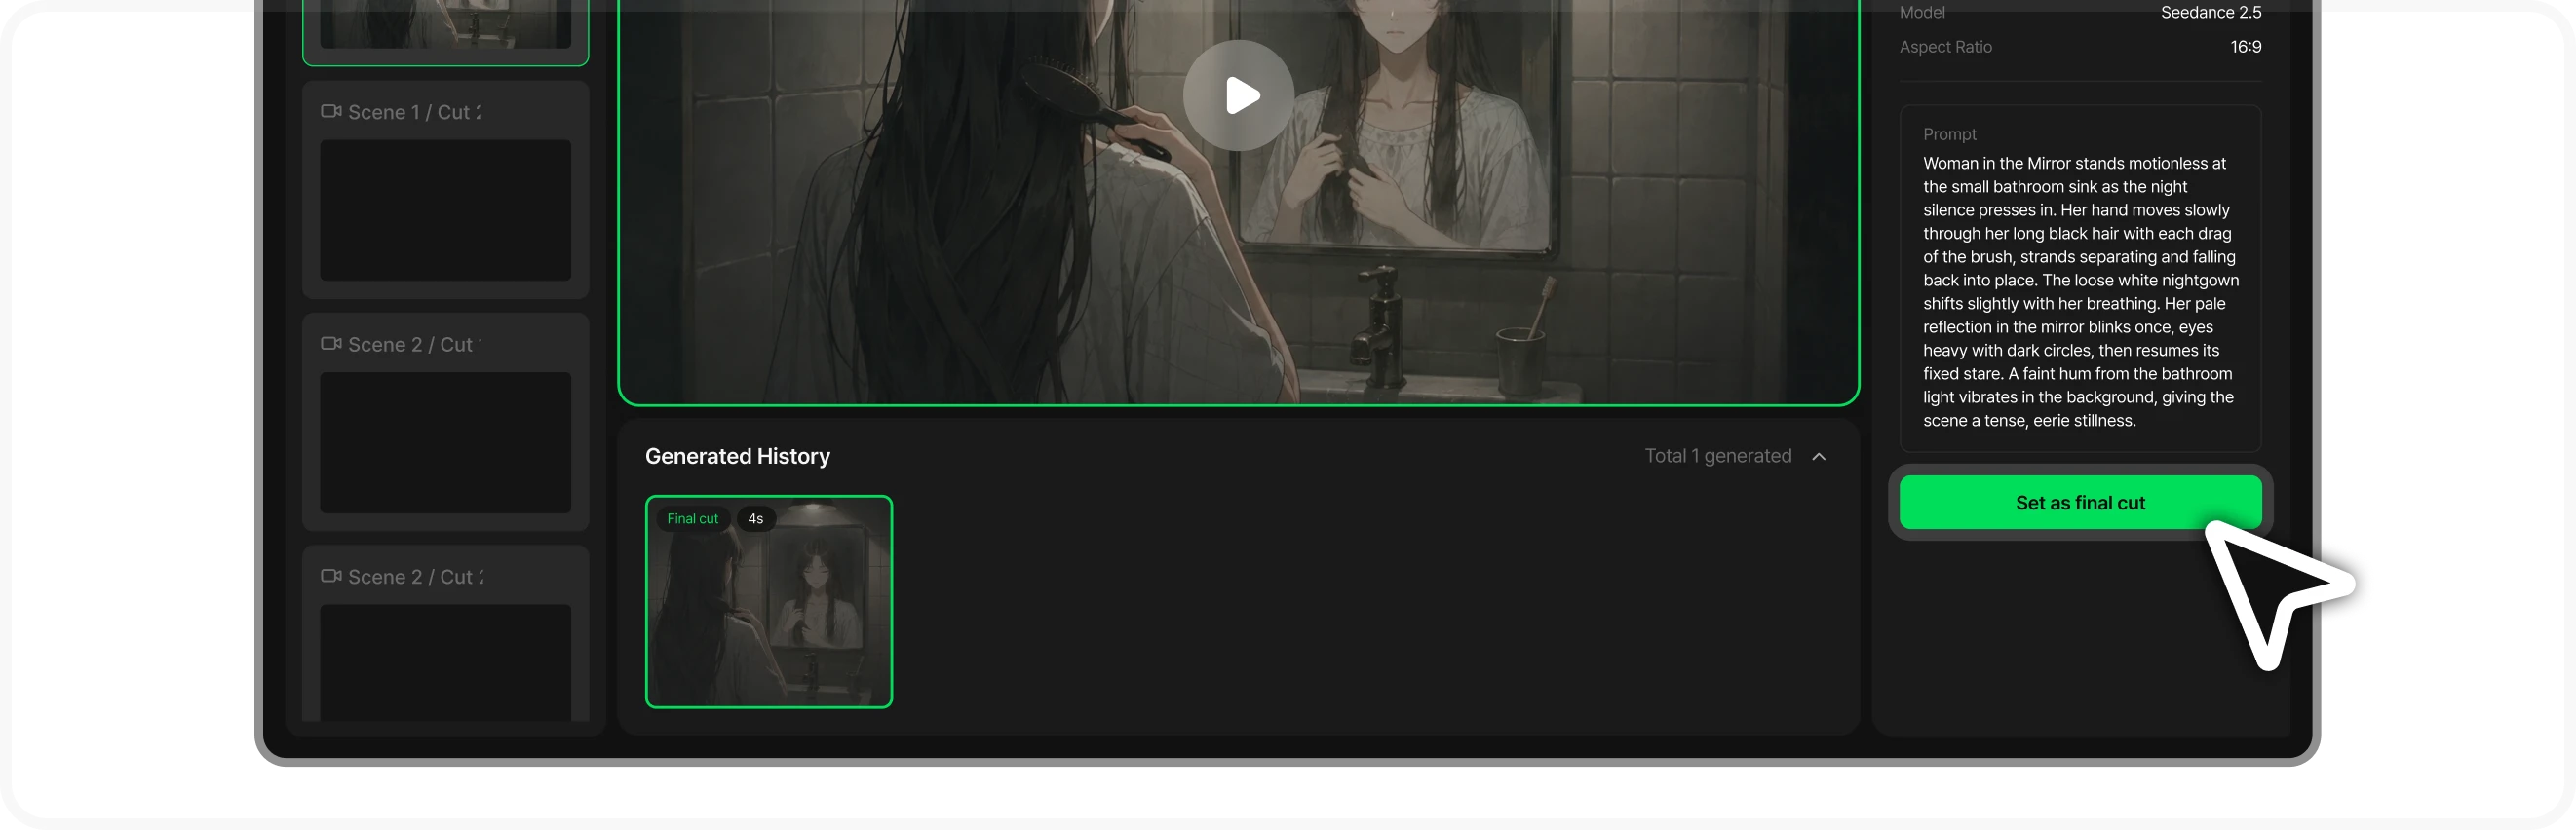
Select an image or video and tap Final Cut.
- The final cut (thumbnail) is the image shown on the storyboard's cut card, and the default first frame when you make the cut's video.
- If you don't set one yourself, the most recently made result becomes the representative automatically.
- A video can be set as the final cut only after you've generated a video for that cut.
Make the cut video
Once you've settled on an image you like, it's time to bring it to life.
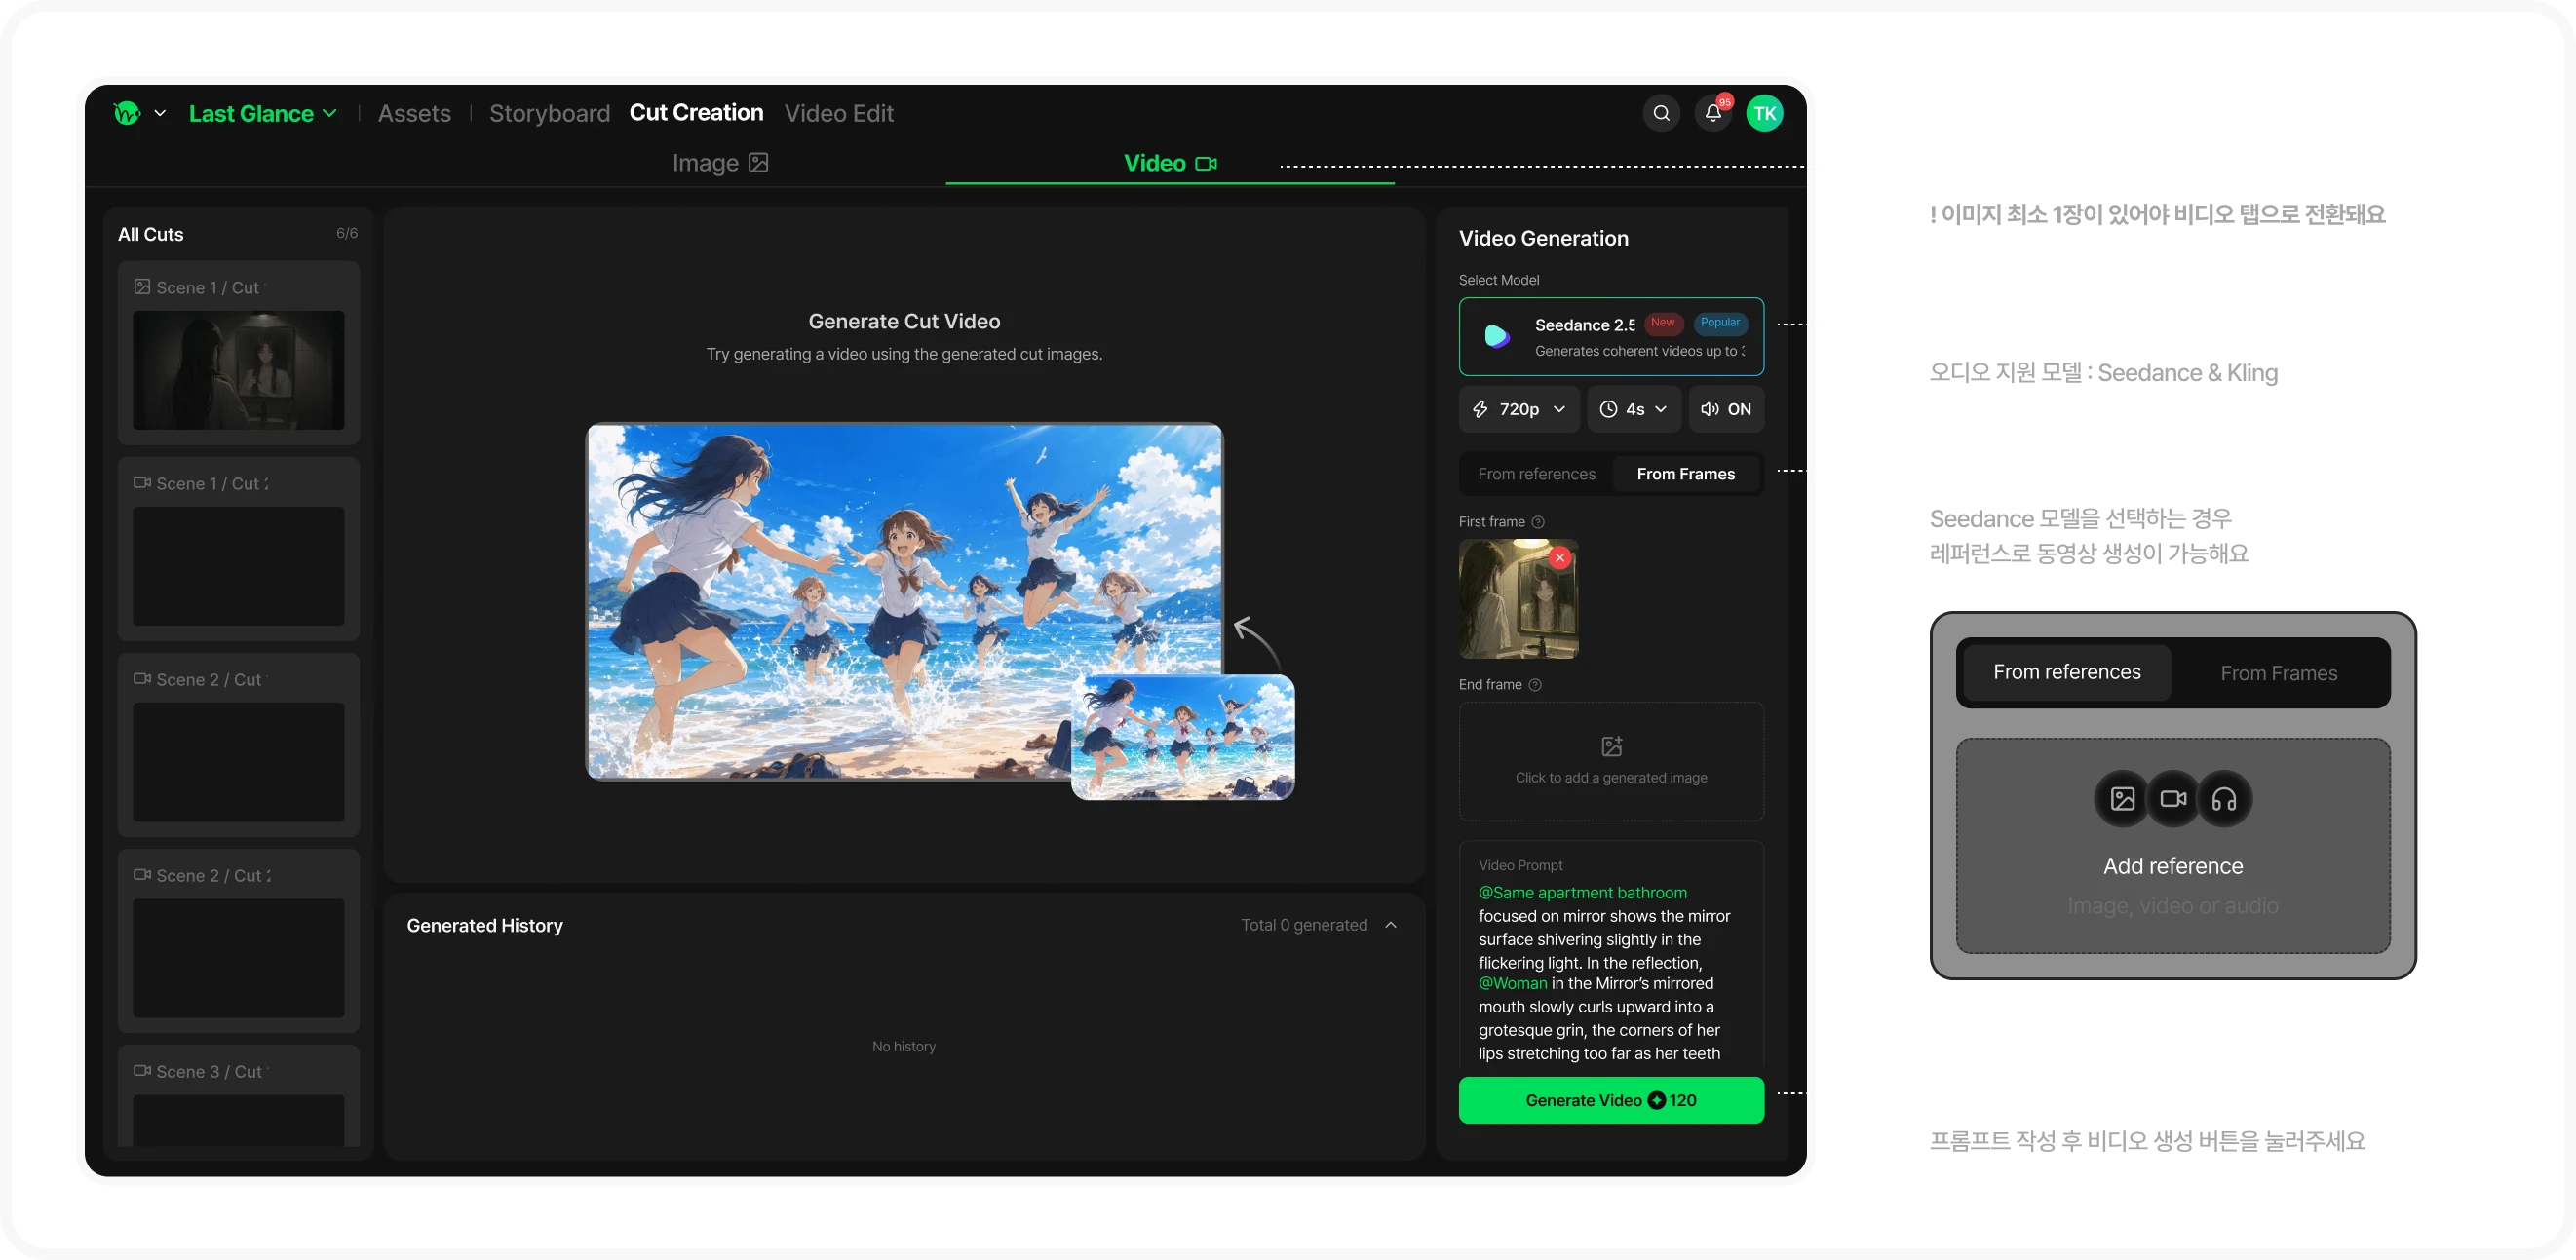
1.Switch from image to video in the top tab
Click Video in the top tab to switch to the video tab — that image is automatically set as the first frame.
2.Set model, resolution, and length
Choose the model, resolution, and length, and turn on generate-with-audio too if the model supports it.
3.Set a first or end frame
If you have a specific ending scene in mind, you can set an end frame too — just pick from your generated images.
You can also set a generated image as the end frame while keeping the scene you want as a separate first frame.
NEW FEATURE(Sep 2026 update)*You can generate a video using a reference, not just a generated image.
4.Generate the video
Write camera movement or action in the video prompt and tap Generate Video. Credits vary by resolution × length and are shown on the button.
Finished videos pile up in the history, and you can play them back in the canvas to check them.
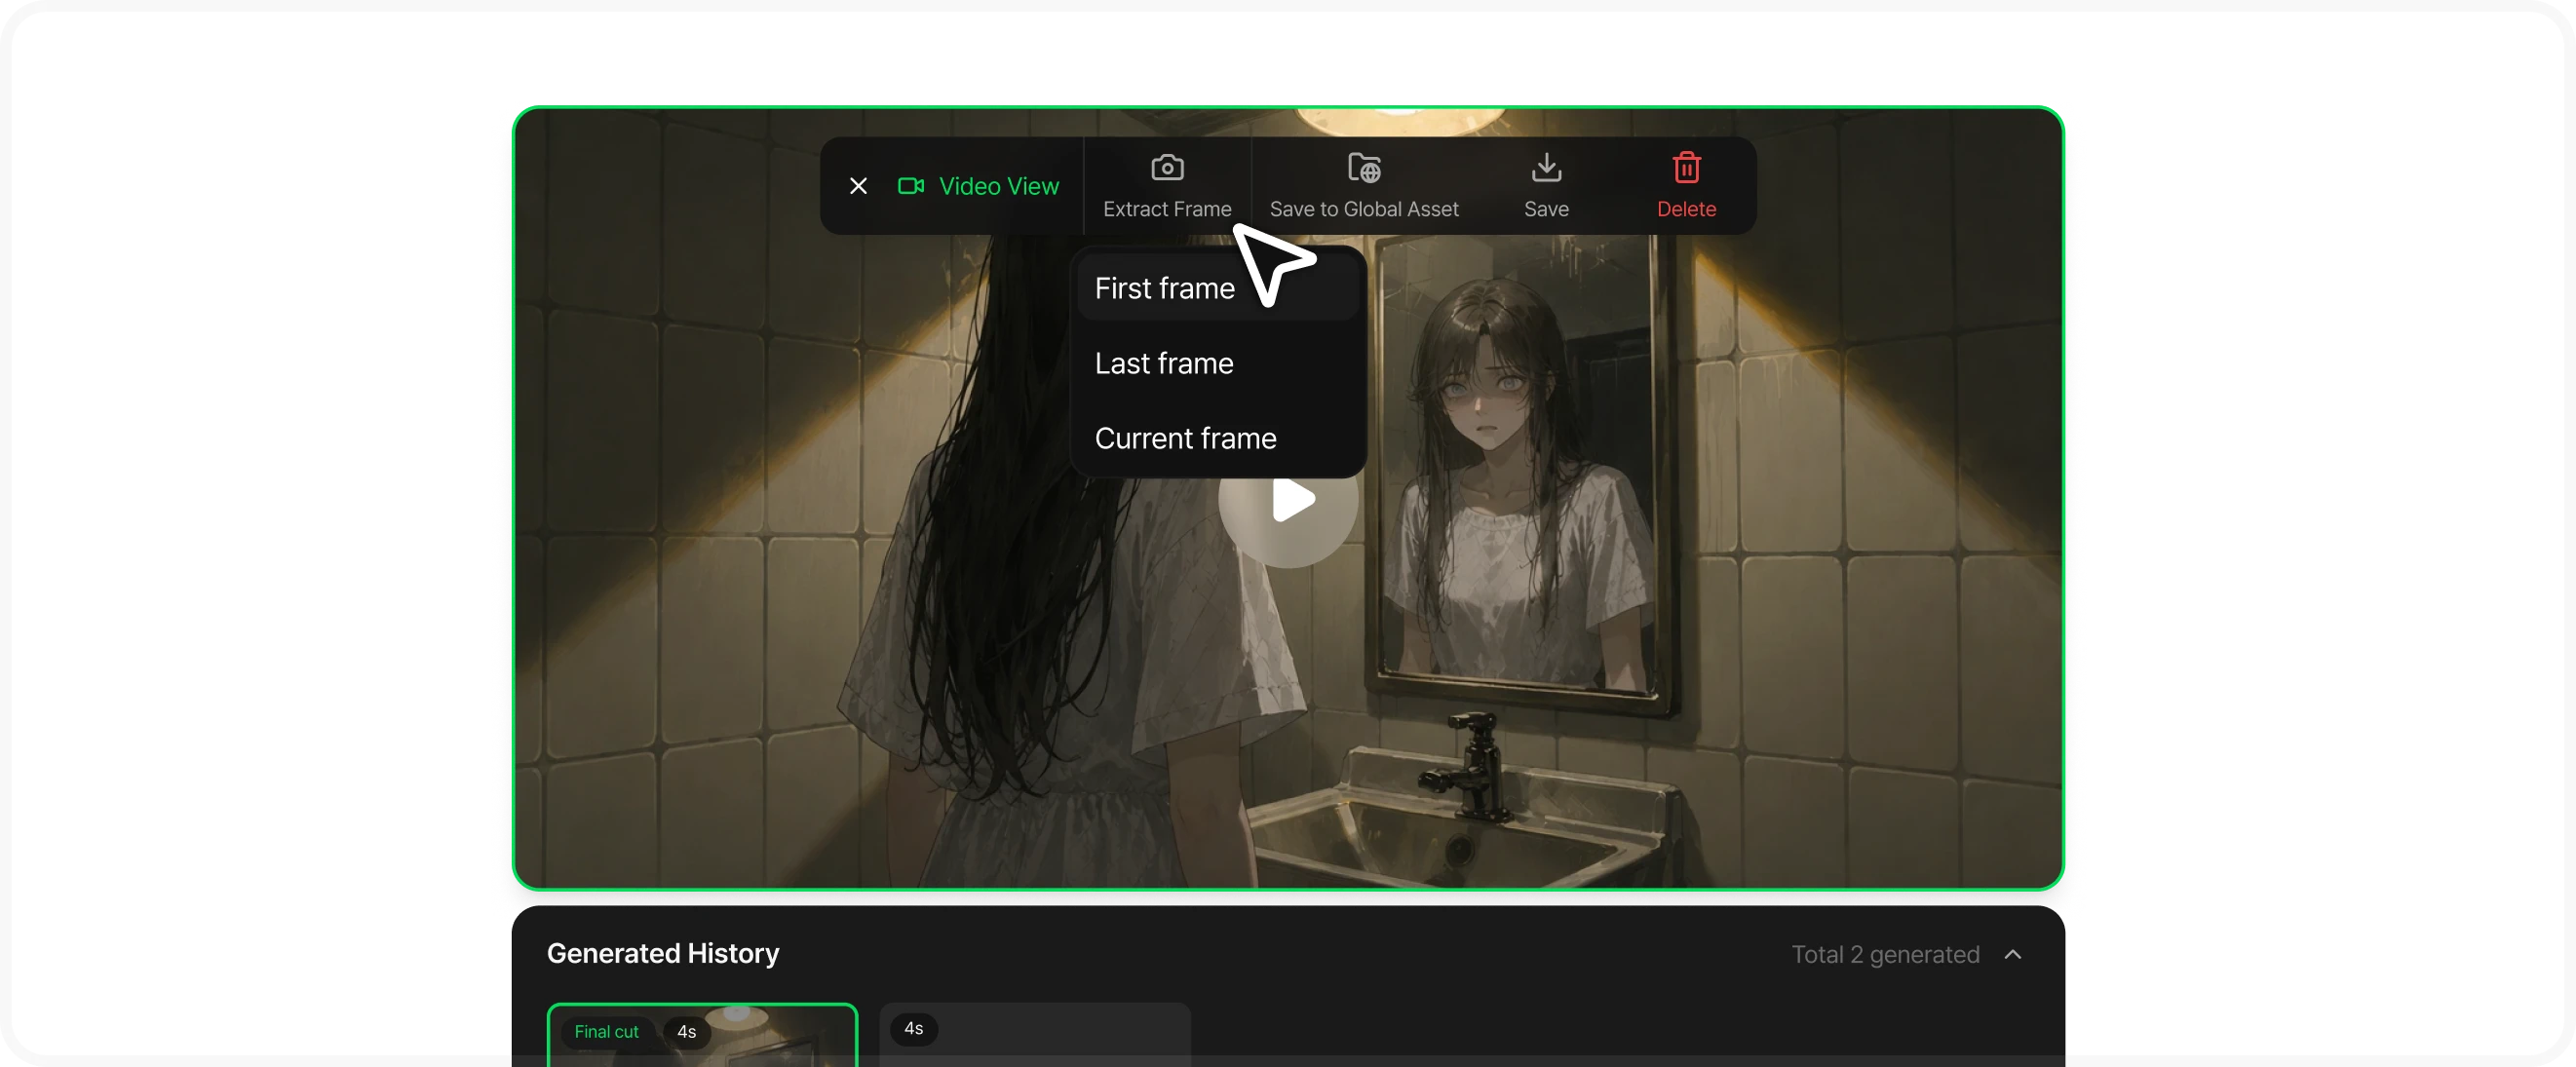
Pull a frame from a video — Extract Frame
If there's a moment you like in a generated video, use Extract Frame in the video view toolbar to capture that frame as a cut image.
Choose from the first, last, or current frame.
The extracted frame is added to the Image tab's history so you can use it as material for your next generation.
Save and organize
Once all cut videos are ready, return to the storyboard and select Go to Video Editing.
| Save | Download the image or video as a file. |
|---|---|
| Save to Global Asset | Keep it in your library and reuse it in Playground, other storyboards, and Canvas. |
| Delete | Remove a generated cut image or video. Deleted results can't be recovered. |
Tips & Credits
Always check your credits
Image/video generation, AI Edit, and Change Style all use credits. Check the cost next to each generate button.
Be generous with area selection
When selecting an area for AI Edit, brush a bit wider than the part you actually want to change — it keeps the edges looking natural.
Text and speech bubbles go in Video Edit
This screen has no way to add text or speech bubbles. Add captions and text in Video Edit instead.